

Bouncing back and forth between two or more parts of a large Microsoft Word document involves a lot of vertical scrolls—and it isn’t fun. Anyone working on a large Microsoft Word document will find it annoying, especially when one part of the document is needed as a frequent reference while you work.
So what do you do? Do you open two instances of the same document and Alt + Tab between them? Or is there a feature in Microsoft Word that makes it easier?
Actually, yes, such a feature exists. Everyone knows you can freeze rows and columns in Microsoft Excel, but did you know that Microsoft Word has its own ability to freeze sections of a document? Quite useful for comparing sections of the same document, or comparing multiple documents at the same time.
How to Freeze Part of a Word Document
Here’s a common scenario: You are writing a lengthy professional report in Word with many different sections. Some sections refer to a previous part, which makes you scroll up and down repeatedly. You may also need to copy-and-paste text or graphics between sections.
Microsoft Word can split the window and allow you to view different parts of the same document without scrolling too much.
- Open your document in Word.
- Go to the Ribbon> View tab > click on Split.
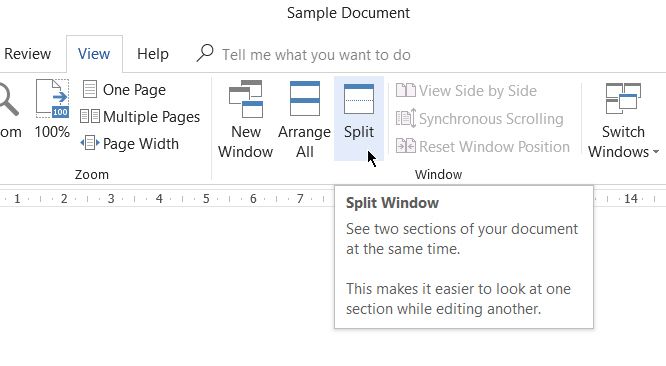
- The document is now divided into two panes with a movable dividing line in between. Adjust the relative sizes of the panes with the mouse. Move the mouse pointer to the dividing line, and when you see the split pointer, click and drag the dividing line to a new position.
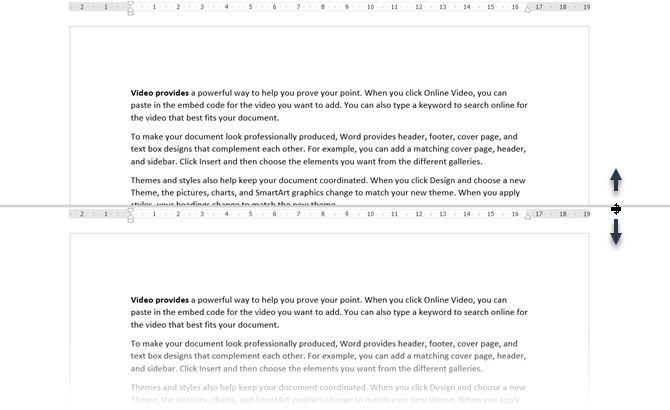
- To activate a split copy, just click anywhere inside it. With the document split into two panes, you can work on one pane while keeping the other pane static or “frozen” for easy reference. In the above figure, the top pane is kept static while the bottom pane becomes the work area.
- The Split can be removed by: clicking on View > Remove Split, dragging the dividing line to the top or bottom edge of the window, or double-clicking on the divider line.


Working With Split Documents in Microsoft Word
Here are a few important points to remember when you have split the document screen into two parts:
- After creating the split, click in the pane that you want to change, and then select a different layout on the View tab.
You can treat the two panes as two separate windows and use the different View commands to change the layout of the sections. For instance, you can keep the top pane in the Print layout, while working on the Web layout in the bottom pane. Or keep the top pane in the Outline view and the bottom one in the normal Print layout. - It’s the same document, so any layout or formatting changes will affect both the copies. For example, if you make some text bold in the upper copy, the same text will automatically become bold in the lower copy too.
- You can set different zoom levels for the split sections. This is helpful for the elderly or even if you want to zoom into charts and tables.
- You can use the bottom split like a Print Preview screen. Arrange the bottom screen to show multiple pages (View > Multiple Pages) to get a nice overview of how your document is designed.
What If You Want to Split a Word Document Vertically?
In short, you are out of luck because Word only allows the horizontal split in the same document. But there’s a quick and dirty workaround you can use.
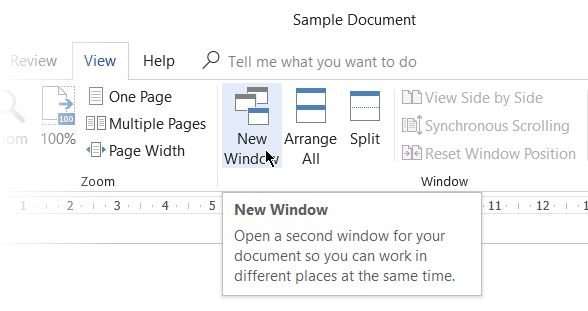
- Open two separate instances of the same document. In Microsoft Word 2016, open the first document. Then, go to File > View > New Window.
- Select View > View Side by Side. The same document will open in an adjacent window and allow you to work side-by-side mimicking a vertical split.
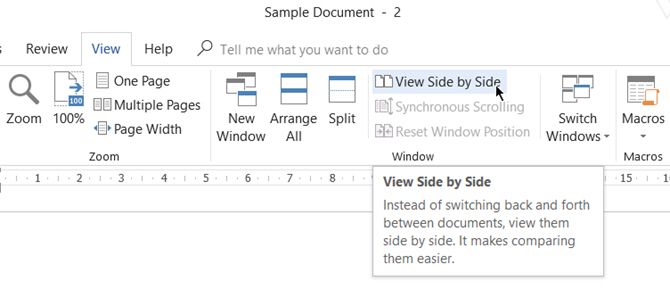
- If you scroll up or down, the other scrolls as well. If you want to freeze one and just scroll the other select Synchronous Scrolling to turn it off.


Improve Your Microsoft Word Experience
The Split button can make life a lot easier when you have a wordy document on your hands. Try this button the next time you decide to make a table of contents in Word. You don’t have to drag the scrollbar up and down to refer to each part of it. Or open and switch windows. Use the features in the View tab to make your reading and proofreading job easier.
Read the full article: How to Freeze a Part of a Word Document for Easy Reference
from MakeUseOf https://ift.tt/2ABfTIF
No comments:
Post a Comment