Costing as little as $5, you can turn any Raspberry Pi into a whole host of useful devices: a Minecraft server, a retro gaming station, a desktop PC, or even a homemade laptop.
But how useful is it for playing music and audio files?
The Raspberry Pi as a Media Player
Not only can you use a Raspberry Pi as a Kodi media center, a Raspberry Pi can also play music. Thanks to the audio out port (see below), you can pipe music through to a dedicated speaker or simple headphones. With HDMI, you can even send audio to your TV (which you probably already knew).
But how do you play MP3s on Raspberry Pi without installing Kodi first?
Several tools can be installed on Raspbian (or whatever Raspberry Pi operating system you’re using) to play MP3, FLAC, OGG, even WAV files on your Raspberry Pi. With the right software, you might even be able to set up playlists and subscribe to podcasts!
Copying MP3 Files to Your Raspberry Pi
To get started playing MP3 or other audio files on your Raspberry Pi, you’ll need to either download some (via the browser), or copy them across.
You have several options for copying data to your Pi:
- Transfer files with a USB stick
- Upload files to your cloud account and download to the Pi
- Transfer using an external hard disk drive
- Copy data to the /boot/partition on your Pi’s microSD card
- Transfer data via SSH using a desktop SFTP app (such as FileZilla)
Find full details on all of these methods using our guide to transferring data between a Raspberry Pi and desktop PC.
Outputting Sound From Your Raspberry Pi
While HDMI is probably adequate, you might want to use the A/V socket on your Raspberry Pi. This might be the case if your HDMI cable doesn’t carry sound, for example, or the monitor speakers are faulty.
The Raspberry Pi 2 and later has a 3.5mm A/V port for use with audio and video TRRS compatible RCA cables. While the colors may not match those on your TV (some swapping around is required), the results are good. It’s thanks to this connector that the Raspberry Pi can be hooked up to old TVs for authentic retro gaming experiences.
In addition to video and audio, the port can also output audio only. A standard headphone jack can be connected, for example, as can a speaker. (For the best results, use a powered loudspeaker.)
Playing Audio in the Command Line With omxplayer
You should find omxplayer is already bundled with your Raspberry Pi. If not, use:
sudo apt update
sudo apt install omxplayer
Run from the terminal, omxplayer has a help file that you can check using:
omxplayer -h
However, to get started, all you need to know is the file path and filename of the audio file you wish to play.
In this example, I’ve copied an MP3 file (Led Zeppelin’s “In My Time of Dying”) to my Raspberry Pi and play it with omxplayer:
omxplayer inmytimeofdying.mp3
It’s really as simple as that:

However, as you’ll discover when checking the help notes for omxplayer, you can do so much more, such as specify a particular route for the audio. To send the file through your HDMI cable, for example, use the audio pass-through switch, -o:
omxplayer -o hdmi [AUDIO_FILENAME]
You could also use the both command to play the audio through HDMI and the local output. The possibilities for audio (and video) playback with omxplayer are considerable, so once you get to grips with it you’ll find it a great tool to have to hand.
Playing Audio on a Desktop PC With VLC
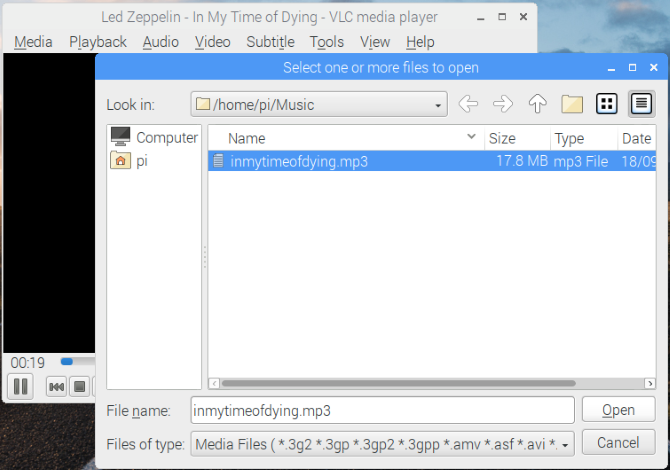
If you would rather use a desktop computer to enjoy audio on your Raspberry Pi, the best option is VLC Player. Capable of playing all manner of media, VLC Player will play audio in virtually any format.
To install VLC, open a terminal and use:
sudo apt update
sudo apt install vlc
Wait for the software to download and agree to installation:

Note: VLC Player on the Raspberry Pi comes in two flavors. There is the main version, for easy installation, and the source version that can be compiled with hardware acceleration for better performance. You probably won’t need hardware acceleration for playing audio, although it might come in useful for high-definition video.
That’s all you need to do. The app will be added to a new menu subfolder called Sound & Video. Launch VLC from the desktop when you’re ready to playback your favorite audio tracks. (By the way, check out our tips on the best hidden VLC features.)
Enjoy Music With Your Raspberry Pi
It doesn’t take long to get music and audio playing on your Raspberry Pi. In fact, the main problem you’ll face is organization. So when you’re migrating your audiobooks or albums to your Pi’s storage, make sure everything is sorted correctly.
Believe us, having multiple directories labeled “Disc 2” is going to cause a lot of problems when you’re searching for a particular song!
Of course, you have other options to play music with your Raspberry Pi. Installing Plex will turn the Raspberry Pi into a media server and player for your home network.
Read the full article: How to Play MP3 and Other Audio Files on a Raspberry Pi
from MakeUseOf https://ift.tt/2N8GHRR

No comments:
Post a Comment