
Once you have figured out the basics of using Trello, it’s time to level up! Your favorite digital Kanban tool hides quite a few useful tricks up its sleeve, and in this article we’re going to explore a few of them and how you can make use of them.
1. Turn Any Webpage Into a Trello Card
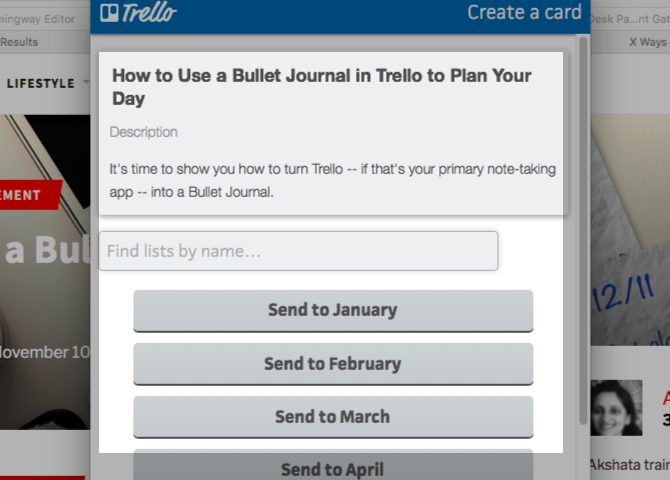
Find yourself creating many cards while browsing the web for inspiration or research?
You don’t have to interrupt your workflow by switching to a Trello board every time you want to create a card. With this Trello bookmarklet, you can turn webpages into cards on the fly.
Once you drag the Send to Trello bookmarklet to your Bookmarks, you’re all set. The next time you’re on a webpage that you would like to convert to a card, click on this bookmark in your browser’s bookmarks bar.
You’ll then get a popup in which you can select the board and list where the new card should go. If you change your mind midway and don’t want to create the card after all, hit the Never Mind button in the popup.
2. Use Markdown in Trello
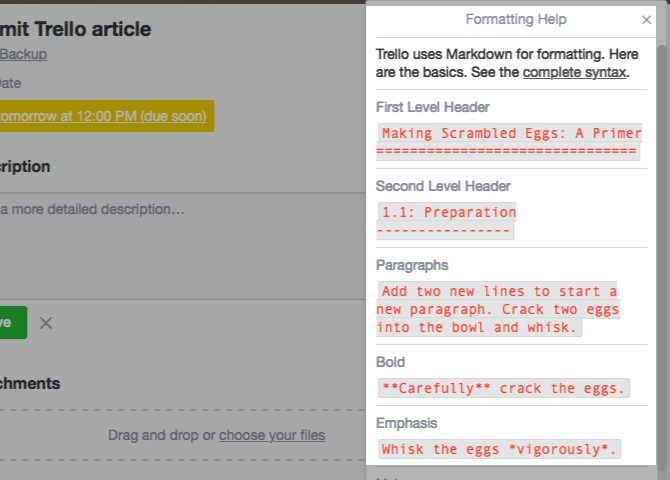
Markdown is everywhere, and with good reason. It makes writing for the web faster and intuitive. You can now use Markdown in your Trello workflow.
Basic formatting like emphasis, italics, and links follows standard Markdown syntax. Trello does have a few formatting restrictions in place. For example, certain syntax works only with card descriptions and comments, while some of it works in checklist items as well. It’s a pity you can’t use Markdown in card titles.
Read the official help page to learn how to format your text the Trello way. Want a quicker solution? Click on the Formatting Help link when you’re viewing the back of a card. Trello will then display its basic Markdown formatting rules in a popup on the right.
3. Clone Public Boards
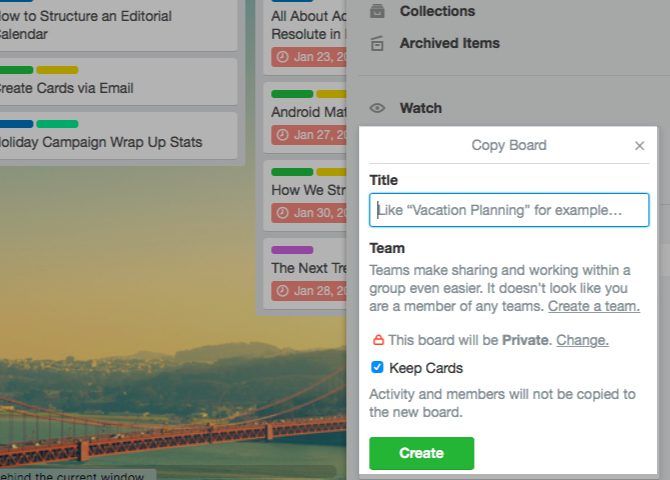
Cloning boards with the Copy Board option in the Show Menu sidebar is one of those essential Trello productivity tips we recommend to all users. But don’t stop at your own boards!
With a bit of effort, you’ll find plenty of useful public boards to copy and repurpose. Trello itself has a roundup of handy public boards to inspire you.
Any public board you copy to your account is automatically classified as Private. Also, while copying the board you get the option to rename the copy and discard the cards if you would rather have only the lists in place.
4. Enable Trello Power-Ups

The power of Trello’s Power-Ups allows you to integrate custom fields plus data from various apps into your Trello boards.
For example, you can set reminders with the Card Repeater Power-Up, or build your own forms with the JotForm Power-Up.
This feature alone might be enough to tempt you to upgrade your Trello account to Business Class. (Each board in the free tier has a limit of one Power-Up.)
To enable a Power-Up for a board, first click on the Show Menu button in the top right section. In the fly-out sidebar that appears, click on the Power-Ups option to reveal Trello’s library of versatile add-ons. Hit the Enable button for any of them to integrate the Power-Up into the active board.
5. Automate Trello Card Creation
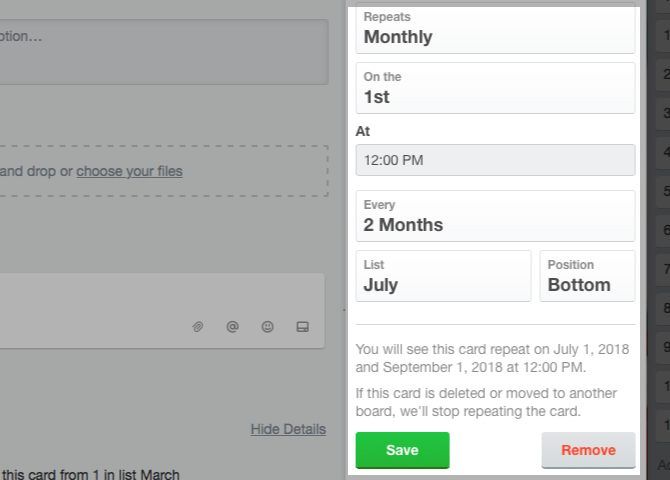
Take the pain out of creating recurring cards by hand with a tool or two. One way to do that is with the Card Repeater Power-Up that we mentioned in the above section.
Once you enable the Power-Up, you’ll see a Repeat button appear under Power-Ups in the sidebar on the card back. Click on that button to schedule card creation. You get to pick the list, position, day of the week, time, and the frequency for recurring cards. After you tweak the available options, hit the Save button.
You can also fall back on the trusty IFTTT for some Trello automation. This IFTTT recipe creates cards out of emails in Gmail.
The Butler and Zapier Power-Ups can also automate the card creation process for you.
6. Cut, Copy, and Paste Trello Cards
While you’re used to the universal cut-copy-paste shortcut trio of Ctrl + X, Ctrl + C, Ctrl + V, you probably don’t expect it to work on cards. But it does! The best part is that it works across boards.
Hover over any card and cut or copy it. Next, hover over the Add a card button in any list on any board and hit the keyboard shortcut to paste.
Of course, you’ll have to replace the Ctrl key in the shortcuts with the Cmd key if you’re a macOS user.
7. Change Due Dates With Drag-and-Drop
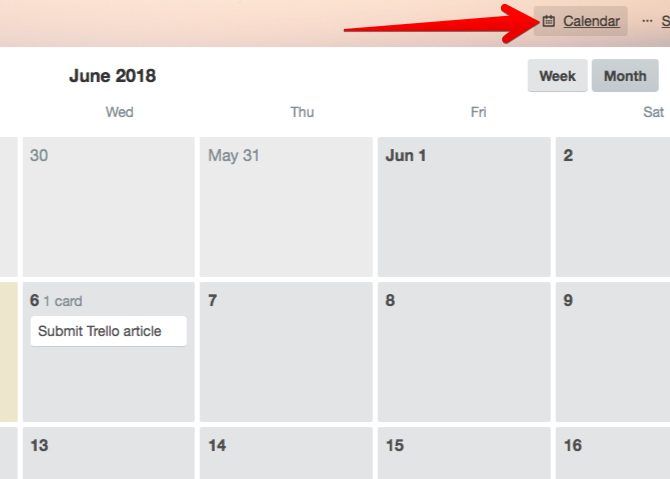
Want to reassign due dates for several cards? Sure, you can do it one at a time as usual. But you don’t have to!
If you enable the Calendar Power-Up, you can reschedule cards by dragging and dropping them onto the right date in the calendar view. This view shows up when you click on the Calendar button to the left of the Show Menu button.
Keep in mind that the Calendar button shows up only after you enable the Power-Up.
8. Insert New Lists Between Existing Lists
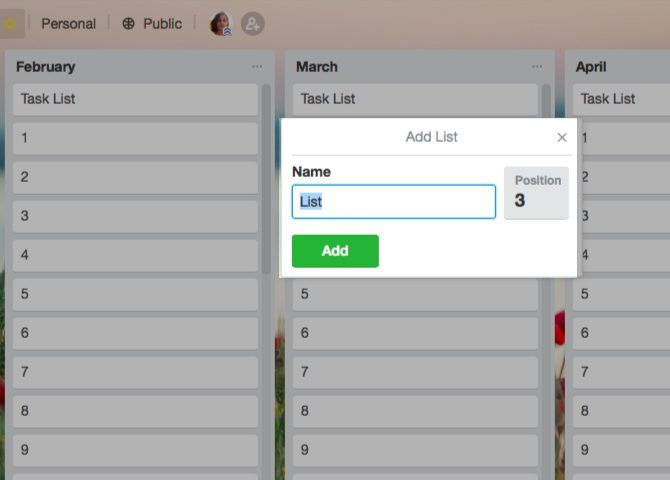
Clicking on the Add a List button after the last list on a board is how you create lists. If you want the new list to appear in a different position, you have to drag and drop it to the right location.
Want a quicker way to do that?
There is one. To insert a new list between two existing lists, double-click on the empty space between them. You’ll then see an option to create a new list right there.
If you double-click in the space below any list, you can create a new one to show up right after that list.
Add More Power to Trello With Third-Party Tools
Wish Trello could do this or that? It probably can, once you power it up with smart third-party tools. Start by getting a few browser extensions for Trello. They allow you to add card numbers, advanced sort options, list hiding, and so on. Next, move on to a few essential Trello integrations that will make your job easier.
Trello is as versatile as your ideas are. Once you become familiar with its various nooks and crannies, Trello can keep every bit of your day-to-day life on track. Now, are you ready to explore a few unique ways to use Trello?
Read the full article: Beyond Trello Basics: 8 Handy Tips and Tricks for a Faster Workflow
from MakeUseOf https://ift.tt/2HvpFuk

No comments:
Post a Comment