As of July 2018, Google started marking your website as “not secure” for anyone visiting it using Google Chrome. If you don’t want to lose traffic, it’s a good idea to make sure SSL is set up on your site so people can visit it via HTTPS protocol.
Now is the time to set that up; here’s what you need to do.
Note: You may still see your site as “Not secure” after “successfully” installing an SSL certificate. See our troubleshooting tips at the end of this article for that.
Step 1: Grab Your SSL Certificate
According to the Google Developers blog, enabling HTTPS on your website doesn’t only protect the integrity of your data. HTTPS is also a requirement for many new browser features. Not only that, but it makes your visitors feel more secure whenever they visit your site. These are important reasons your site needs an SSL certificate.
Recently, if you open your website using a Chrome browser, you’ve probably seen that big, ugly “Not Secure” message in front of your URL.
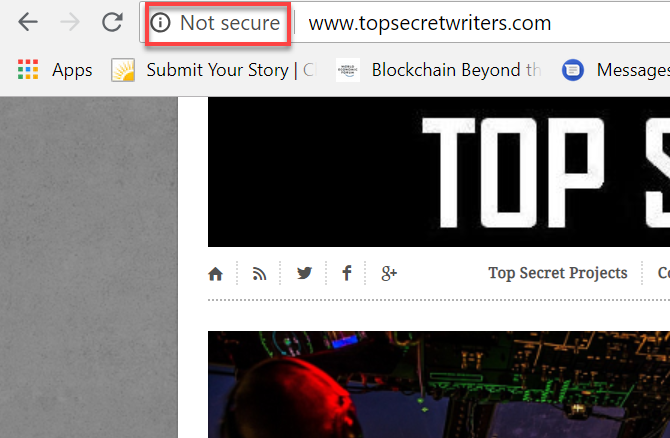
That’s not a pleasant thing to see when you’ve invested so much of your time and effort into developing a great website for your visitors.
Before you run out and look for an SSL certificate to buy, make sure you already know where you stand with your current web host.
SSL is fairly simple to set up, but you need to follow the right procedure for your situation. If your web host already offers a free SSL solution, then don’t waste money buying a certificate.
You might also consider reconsidering your choice of web hosts.
These are typically the SSL certificate options you have to choose from.
- Free SSL certificate from your existing web host.
- Get a free SSL certificate from services like Let’s Encrypt, Comodo, or Cloudflare.
- Purchase an SSL certificate from services like DigiCert, Namecheap, or GoDaddy.
SSL services that offer free SSL certificates often also offer paid ones.
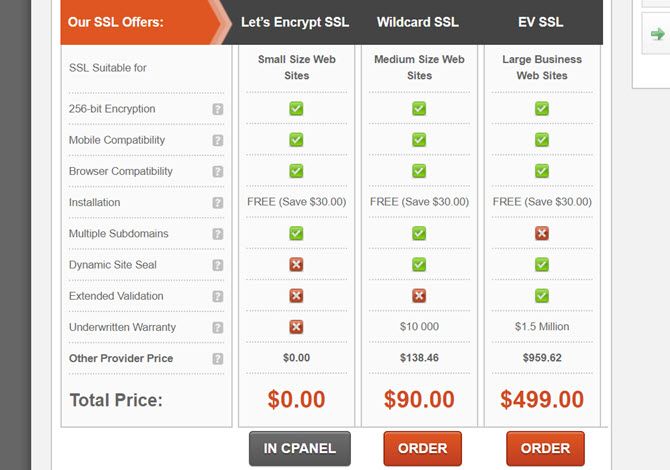
The difference is that most free certificates need to be manually renewed. You can do this via a cron job, but that’s beyond the scope of this article.
Some web hosts actually offer free management of those cron jobs if you use a service like Let’s Encrypt. SiteGround is one host that does this.
Whichever option you go with, when you order a certificate you’ll see a page like the one below. Both the certificate and the key are a part of the package.
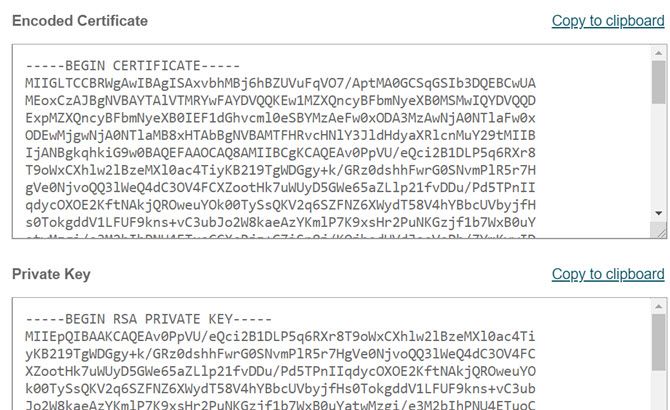
Copy both blocks of encrypted text and save them to a safe place.
Step 2: Install Your SSL Certificate
Most guides that describe how to install an SSL certificate will tell you that you have to have a dedicated IP. This means purchasing a more expensive dedicated hosting plan.
If you have such a plan, and you go into your account you’ll see that you have a dedicated IP associated with it.
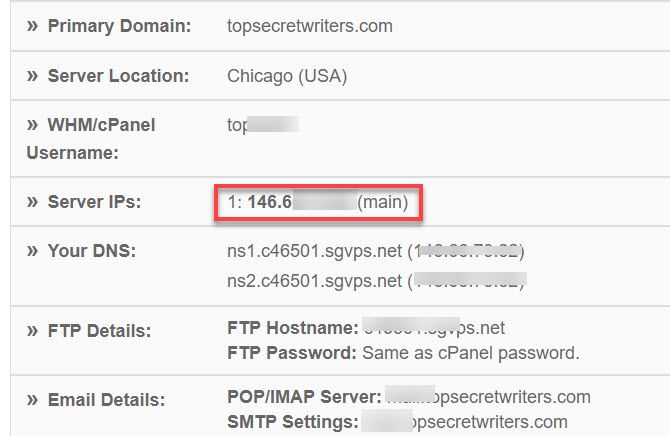
If you have a shared hosting plan, where multiple websites share the same server, then you don’t have a dedicated IP that goes with your URL.
Does that mean you can’t install an SSL certificate without a dedicated hosting plan? No. Thanks to a technology called Server Name Indicator (SNI), you can still install an SSL certificate for your site.
If you have a shared hosting plan, ask your web host whether they support SNI for SSL encryption.
To install your certificate, you’ll need to go into cPanel and click on SSL/TLS Manager.
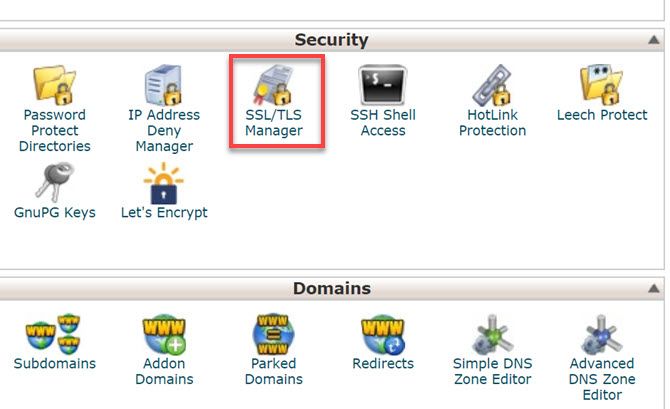
You should see various options for managing SSL certificates.
To install your initial SSL certificate for HTTPS, choose the Install option.
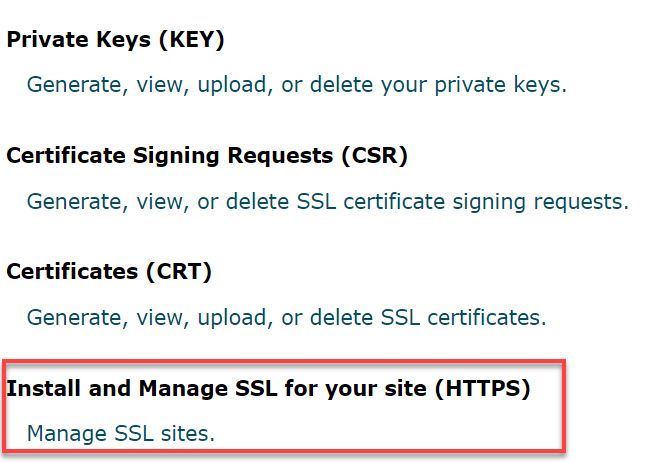
You’ll see the option to choose the domain you’d like to install the certificate onto. Choose the correct domain from the dropdown box.
Next, paste the long encrypted certificate text that you copied when you purchased the certificate.
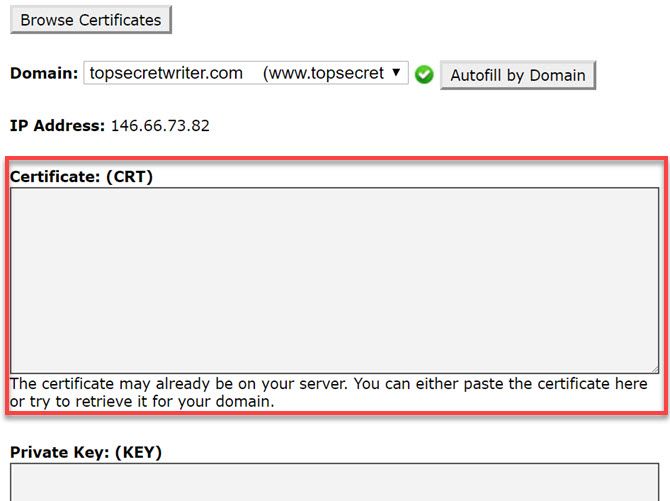
Then, scroll down and also paste the encrypted text for the Private Key that you copied when you bought the certificate.
Once you save, make sure to go into WordPress and refresh all caching. Also clear your browser cache (press Ctrl + F5).
View your site again by typing the site URL with “https://” in front of it. If all is well, you’ll see the “Secure” status in front of your site URL.
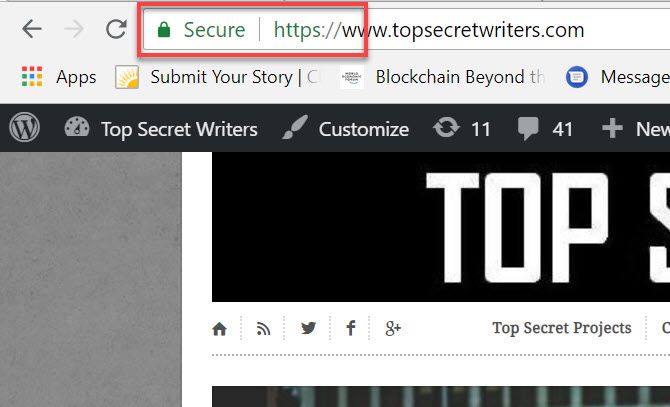
Congratulations! You now have a functioning SSL certificate, and your site can be accessed via HTTPS.
But, you’re not done. If people type in the old URL of your site into their browser, they’ll still see the unsecure version. You need to force all traffic through HTTPS.
How to Enforce HTTPS on Your Site
Your host may actually have a management area set up for you to handle required SSL changes.
For example, Siteground embeds Let’s Encrypt into cPanel. There, HTTPS Settings allow you to turn on HTTP Enforce and External Links Rewrite.
- HTTPS Enforce redirects traffic (like people who only type in the site URL without “https” in front of it, to HTTPS.
- External Links Rewrite modifies external links that start with “http” to “https” so a “Mixed Content” warning doesn’t show up in the browser for your site.
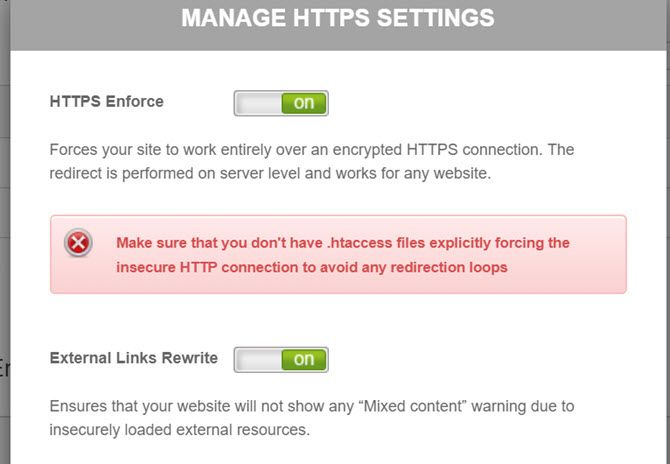
If you don’t have this automated feature with your web host, then you have to do it the manual way.
Browse to the .htaccess file in the root of your web server. Edit it to include the following lines of code.
RewriteCond %{HTTP_HOST} yoursitedomain\.com [NC]
RewriteCond %{SERVER_PORT} 80
RewriteRule ^(.*)$ https://www.yoursitedomain.com/$1 [R,L]
Once you’ve saved this change, anyone who accesses your site via HTTP will be redirected to HTTPS.
Problem 1: CDN Images
You’d think at this point that you’re home free. Well think again.
In many cases, your site may come up, but many of the images will appear broken.
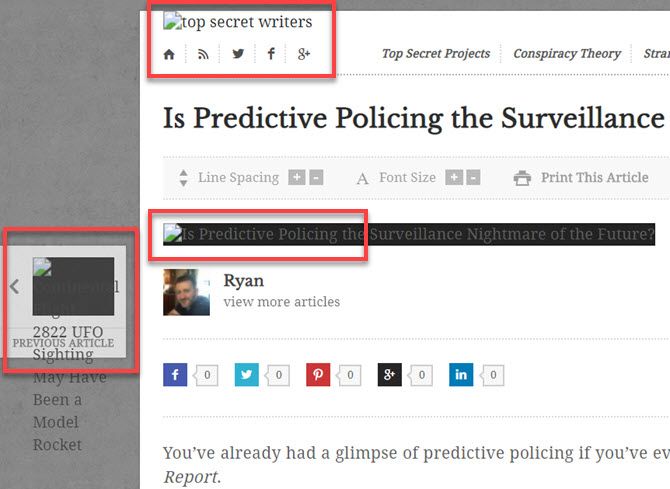
This can happen if you’re using a CDN service for your images. This is because all of your images are provided via the unsecured CDN links. Since your traffic is all redirected to use HTTPS, those images can’t load.
There are two methods of fixing this. The easiest is to modify your SSL certificate to use a wildcard. For example if you use Let’s Encrypt, you’ll see the option to use a wildcard in the SSL management page.
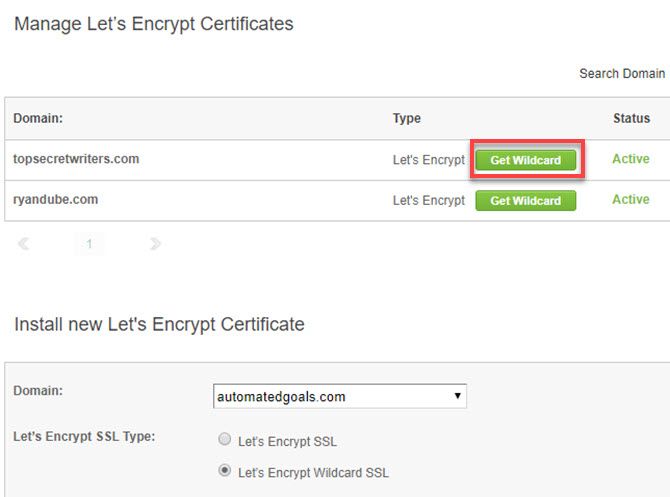
A wildcard lets you use your SSL certificate on any subdomain of your site.
Enable this, and obtain the certificate, private key, and CA bundle encrypted texts from the SSL details.
Go into your CDN service. In the example below, I use MaxCDN. You should find an SSL option in the area where you can manage the Zone for your site.
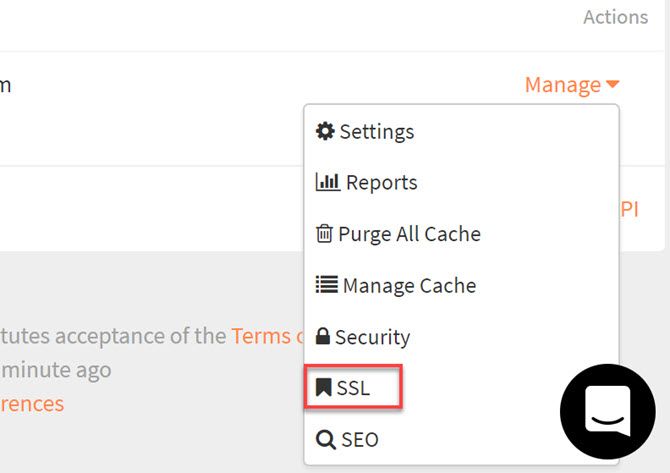
In here, you’ll see fields where you can paste the SSL Certificate and the Private Key.
Use the same encrypted text that you pasted into cPanel previously.
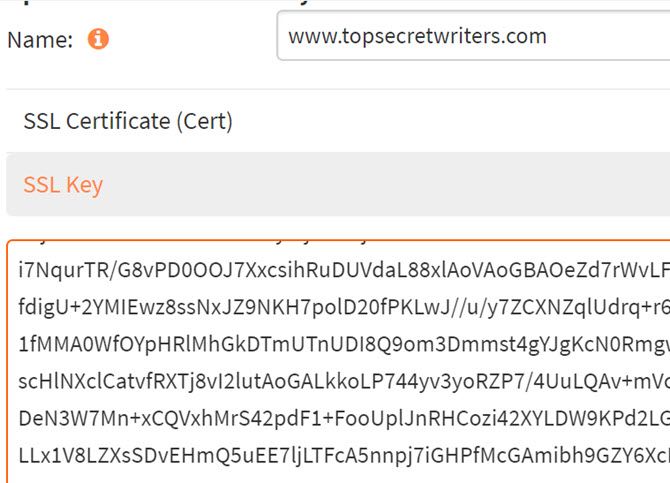
Once you save this, the images should all load properly on your site.
If the SSL service you use doesn’t offer the wildcard option, you’ll actually need to purchase a second SSL certificate for your CDN image assets, and install it using the steps above.
Problem 2: Insecure Links
If you haven’t done anything else to your site except enabled your SSL Certificate and enforced HTTPS, you may still see the “Not Secure” error.
This will even show up when your site loads through HTTPS. The most common cause of this problem is that you still have a bunch of insecure links on your site. This is usually due to links in your sidebar, header, or footer.
Go into WordPress and look through all of your header and footer code, as well as your sidebar widgets. Look for links to services like Gravatar, Facebook, or others.
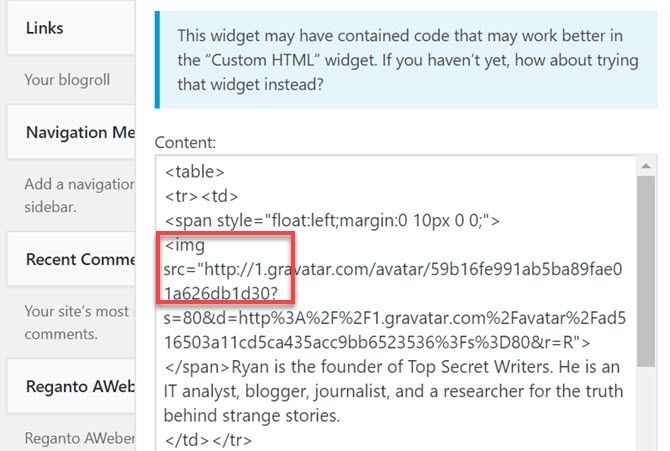
Change those links to use “https” rather than “http”.
Once you’re finished, clear all caches and reload your site. All issues should be resolved at this point and your site is now fully secure!
Protecting Your Visitors With HTTPS Is Smart
Even though your motivation for doing this may be to boost your SEO, the reality is that you’re also protecting your visitors from any packet sniffing hackers.
This is especially valuable if you ask your visitors for information about themselves like names, addresses, phone numbers, or credit card info.
For a personal website, that’s important enough. But if you’re running a business, you should understand why website security is so important to your business success.
Read the full article: How to Set Up HTTPS on Your Site: A Simple Guide
from MakeUseOf https://ift.tt/2QvY4i4

No comments:
Post a Comment