Reckon your Raspberry Pi is just a little computer good for retro gaming, streaming video, and not much else? Wrong! It’s an ideal project computer that you can use for many practical purposes, from looking at the stars to acting as a substitute desktop.
Which means it’s ideal for print projects! Here are six ways you can use a Raspberry Pi with a printer, from basic printing to running a 3D printer.
1. Basic Raspberry Pi Printing
You can print to a printer with a Raspberry Pi in the usual way. Assuming you’re using the Raspbian operating system (it shouldn’t differ if you installed Ubuntu MATE), start by making sure the printer and the Raspberry Pi are on the same network.
Next, open a Terminal window and install the CUPS client software. Do not install the CUPS server software, as that will turn your Raspberry Pi into a print server. Scroll down to the next section to learn a bit more about that.
sudo apt update
sudo apt install cups-client
Follow the displayed instructions to install the client, then open the configuration file in the nano text editor.
sudo nano /etc/cups/client.conf
Here, add the following line:
ServerName [PRINTER.IP.ADDRESS.HERE]
For example, if the printer IP address is 192.168.75.80, you would enter
ServerName 192.168.75.80
Save the file with Ctrl + X, then exit. You’ll be able to print from LibreOffice and various other applications.
2. Wireless AirPlay Printing
With a Wi-Fi dongle attached, or using the Raspberry Pi 3 or later (with built-in Wi-Fi), you can make a pre-wireless printer into a wireless printer.
Better still, it can be configured for AirPlay compatibility, meaning you can print to your old printer from an iPad!

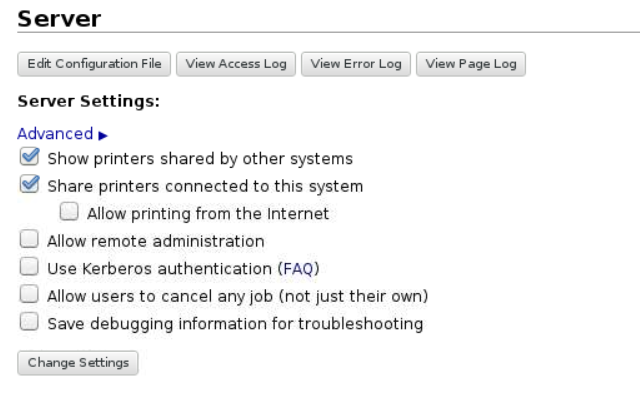
This is all thanks to the CUPS software, installed this time as a server. Simply hook up a USB printer to your Raspberry Pi and configure CUPS correctly to install the driver and make the printer wireless. Our guide to making a wireless printer with your Raspberry Pi gives you all the steps you need to follow.
You don’t have to leave it there, however. Want to print directly from your iOS or Android mobile device? Adding AirPrint support to your Raspberry Pi print server makes this possible, and it’s even simpler than setting up CUPS.
Oh, and you can also set it up to print from Android devices, too!
3. Google Cloud Printing
Need to print something from your phone, tablet, or laptop, but you’re out of the house? Google Cloud Print is a great solution to this, but it requires you to have a suitably-equipped printer.
Fortunately, there is a DIY workaround that uses the Raspberry Pi. You’ll need a Google account, the Chromium browser installed, and set this up with Google Cloud Print.
All you need to do is open Settings > Advanced Settings and find Google Cloud Print. Click Manage Cloud Print devices and sign into your Google account when prompted. Be sure to check the Stay signed in box to ensure your printer remains available.
Click Add printer against the device you want to print from to gain cloud access. You’re then ready to print from anywhere, just as long as you’re signed into the same Google account.
4. Connecting a Thermal Printer
It isn’t only standard inkjet printers that can be connected to a Raspberry Pi. Thermal printers, which use special heat-sensitive paper, can also be hooked up.
“Thermal paper” shouldn’t be unfamiliar to you. ATM receipts, shop receipts, even temporary ID badges in government buildings are typically printed on this heat-sensitive paper. It’s basically paper that has the ink built-in, only appearing when heat is directed. The result is readable, and can be used for barcodes, QR codes, and even photographs.
Compact, and low-powered, a thermal printer might cost more than a budget inkjet, but you won’t need to buy ink! If you don’t own a thermal printer already, start off with the Adafruit model, which is used in the accompanying video.
Thermal printers come in many shapes and sizes. Label printers, such as those produced by Dymo, are typically thermal printers. They’re often found in offices, bought mainly to avoid the waste of printing out a sheet of labels when only one is required.
5. 3D Printing With Raspberry Pi
Want to put your Raspberry Pi in charge of your own mini production line? If you own a 3D printer (or are planning to build one) then the Pi makes a great dedicated system for managing your 3D prints.
Several projects are available that can help you to do this, but the most popular is probably OctoPrint. This is available as a disk image for all Raspberry Pi models, from the A, through to the 3B+, as well as the Zero and Zero W.
If you know how to install a Raspberry Pi operating system, this will be simple to set up, and you can even power the Pi from most 3D printers.
Once up and running, you might even print a new case for your Raspberry Pi. When you’ve done that, check out our list of Raspberry Pi 3D printer projects.
6. Raspberry Pi Wedding Photo Booth
Planning a party or a wedding reception, and not sure about the fee for the wedding booth? Simple: build your own!
Wedding photo booths are typically wooden structures with a push-button camera mounted inside, and a photo printer connected. Often, the wedding organizer will include some amusing props and backgrounds to create a fun-looking photograph.
However, these booths are often expensive to hire, so setting up your own photo booth is a good way to save money.
All you need is a Raspberry Pi, a camera module, and a suitable printer. For extra low-budget point scoring, a label printer or even a thermal printer should work. If you want something a bit more hi-res for people to remember your big day, however, some portable photo printers can work with a Raspberry Pi.
For example, an LG Pocket Photo printer can receive photos via Bluetooth from a Raspberry Pi and instantly output them.
Ways to Print With a Raspberry Pi, Recapped
The Raspberry Pi is so compact and flexible that it can do more than simply send a document to your printer. We’ve looked at six ways to print with the Pi:
- Basic local and wireless printing
- Make a print server with AirPlay support
- Set up Google Cloud Print
- Use a thermal printer
- Control a 3D printer
- Create a wedding photo booth
Looking for more projects? Check our list of awesome ways to use a Raspberry Pi.
Read the full article: 6 Ways to Print With a Raspberry Pi
from MakeUseOf https://ift.tt/2FBj5qv

No comments:
Post a Comment